Containerizing a Custom .NET Engine Solution with Docker
Overview
Fluent Engines can be used in a variety of ways to fit with your specific use-case. This article will discuss how to containerize a custom solution using the Fluent .NET engine with Docker. With this method, it is simple to create your own custom implementation of the .NET engine inside of a Docker container.
Requirements
- Windows 10 64-bit: Home/Pro 2004 or higher, or Enterprise/Education 1909 or higher
- Docker Desktop installed, configured to use Windows Containers
- A valid license key for the .NET Engine
Licensing
Fluent licensing exists for many different needs. There are Pros and Cons for each type of License. The FLEX license is meant to be used in automated management environments such as Container management systems, Azure services and Auto scaling virtual environments. If you are planning on hosting your application with the .NET Engine with any of these types of environments, we highly recommend the purchase of a FLEX (per page) license instead of a PRO (per machine/instance) license.
Verify Docker Installation
This guide assumes that you have Docker Desktop installed and configured on your machine. If it is not, follow the Docker Desktop installation documentation here. To verify that your installation was successful, open a command prompt or Powershell window and run the command:
docker
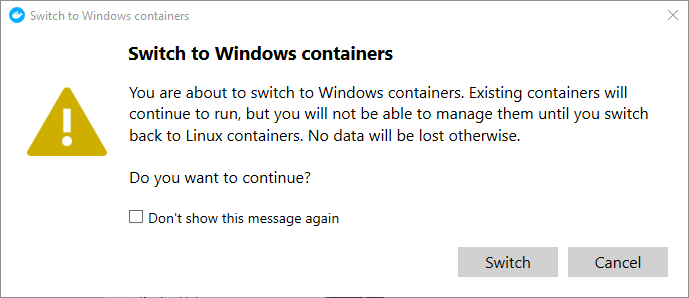
If it returns a list of arguments, then Docker is installed on your machine. Additionally, Docker must be configured to run Windows Containers to successfully containerize the Fluent .NET Engine. To check, right-click on the docker icon located in the hidden icons section of the Windows taskbar.


If the menu that appears says "Switch to Linux containers..." then Docker is configured to run Windows containers. If the menu says "Switch to Windows containers..." then Docker is configured to run Linux containers. To switch, simply click that option in the menu and select "Switch" in the resulting pop-up.
Getting Started
To begin, visit the Fluent Samples github here and download the samples. Inside, you will find the RunReportXml folder in Container Samples/.NET Engine, which contains the files necessary for this guide.
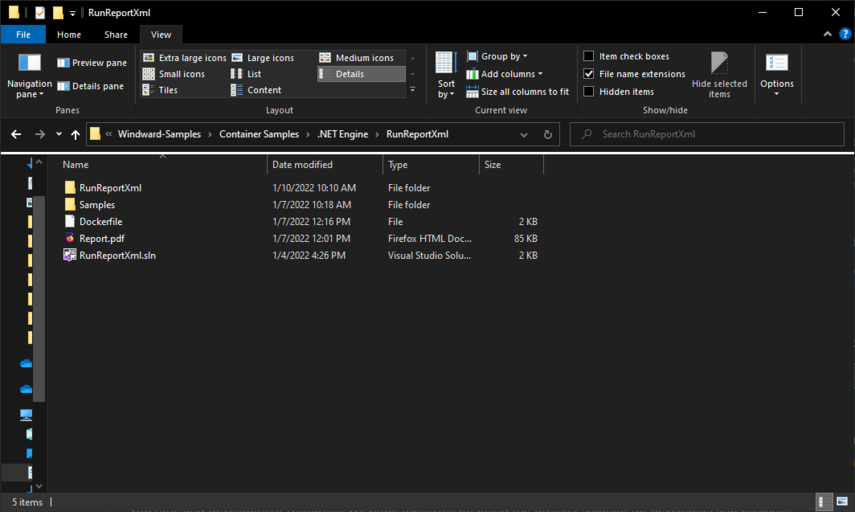
Inside of the RunReportXml folder, you will find the above files.
- RunReportXml is the custom implementation of the .NET engine that we want to containerize
- Samples is the folder containing a sample template and datasource that we will generate output from with the container
- Dockerfile is the Dockerfile that Docker uses to build the image for the container
- Report.pdf is the output that should be generated once everything is run.
- RunReportXml.sln is the Visual Studio solution file for the RunReportXml application
We'll begin with an overview of the RunReportXml application.

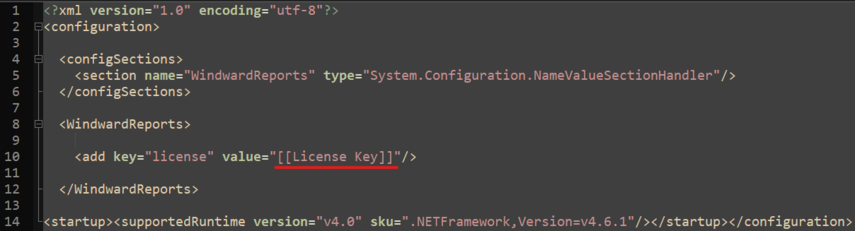
Inside of the RunReportXml folder, you'll find the Properties folder, App.config file, and the source code for the application with its project file. The first item to discuss is the App.config file. The App.config file is how we configure the .NET engine. In this case, we are using it to simply enter the license key for the engine. Open the App.Config file with a text editor of your choice, and replace the "[[License Key]]" text with your license key for the .NET engine.
With your license key entered, the image is ready to be built, and a container can be created with that image. Before we do that, lets walk through the rest of the contents of RunReportXML. Returning to the root folder of the project, open the RunReportXML solution file with Visual Studio. Here you will see how we use the Fluent Engine Nuget package to create a custom implementation of the Fluent .NET engine.

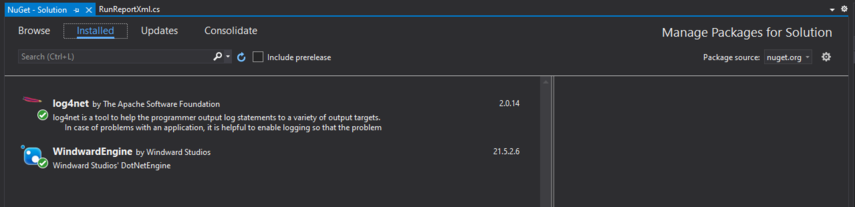
Right-click the Solution tab in the Solution Explorer window, and select "Manage NuGet Packages for Solution..."
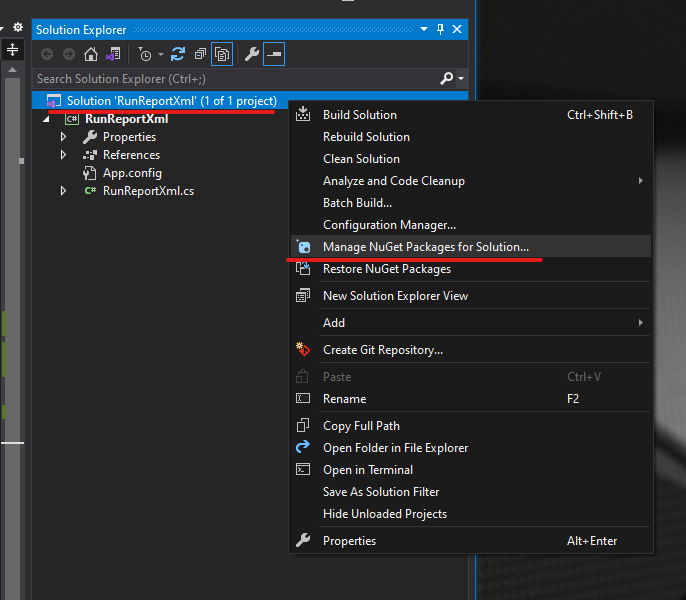
Here you will see the NuGet packages we need for the .NET engine.
For more information on creating a custom implementation of the Fluent .NET engine, look here. Now that we've looked at the implementation that we want to containerize, its time to create the image. For that, we need to look at the Dockerfile located in the root folder.
Dockerfile
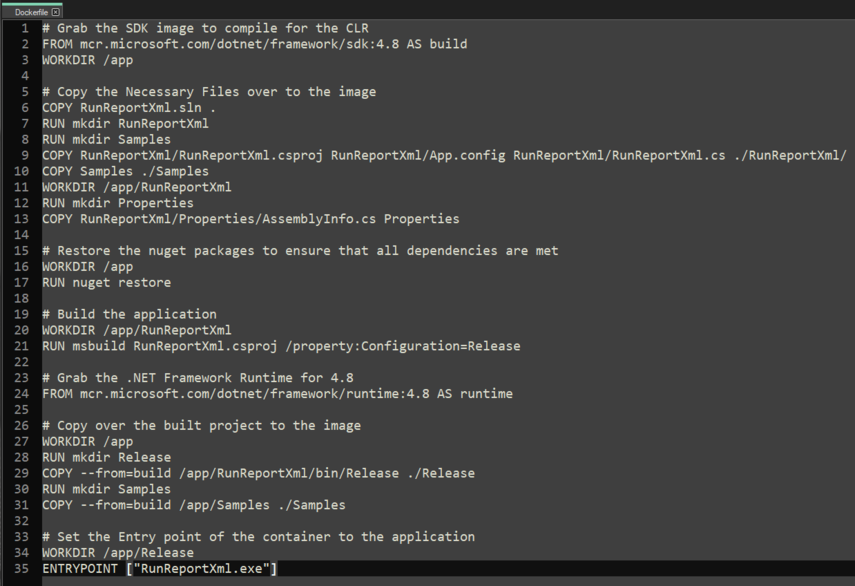
The Dockerfile manages how Docker will build the image for the container. For this guide, Docker is going to use a base image from Microsoft with the .NET framework 4.8 sdk already installed to build our implementation. From there, Docker will then copy over the necessary files to run our project to the final image. Finally, Docker sets the entry point for the image to our custom implementation, so that when a container with this image is run it will automatically run our code, and stop when completed. If you want to play around with the container while it is running, add a "#" symbol before "ENTRYPOINT" on the final line to comment it out. Doing so will result in the container built from this image launching without running our application, allowing you to enter the container while its running to view its file structure and run commands. For further information about Dockerfiles, please use Docker's official documentation here.
Building the Image
Now that you are familiar with what we need to build the image, its time to do so. With command prompt or Powershell, navigate to the root folder of the project, where the RunReportXml.sln file is found. To build the image, run the command:
docker build -t windward-dotnet-engine .
This command builds the image, and names it 'windward-dotnet-engine.' From here, the image is complete and you are ready to create a container with it!
Creating the Container
To run the newly created docker image in a container, simply enter the following command in the same command prompt or Powershell that you used to create the image.
docker run --name WindwardDotnetEngine windward-dotnet-engine
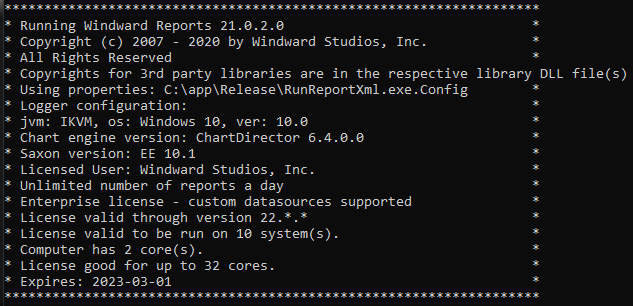
This command creates a Docker container named WindwardDotnetEngine from the windward-dotnet-engine image, and runs the container. If the container was successfully ran, you should see the following output in your command prompt/Powershell window.
Now that the container has run, let's see the output from our template. This output is currently stored in the Samples folder on the Docker container, so in order to get it from the container, in your command prompt/Powershell window run the command:
docker cp WindwardDotnetEngine:/app/Samples/Report.pdf path/to/destination
with "path/to/destination" being the path to where you would like the output to go. Once that command has been run, you should have the newly generated output Report.pdf at the destination that you entered. If the container was successful, your Report.pdf should match the one located in the RunReportXml folder that contains the Samples folder. And that's all! Congrats on successfully containerizing a custom implementation of Fluent .NET engine. For further information on creating your own implementation, the .NET engine API is located here.